Machinima Tips
Custom Animations:
If you want to add custom poses to either the source
models or your own, you will need these tools:
GCFScape http://nemesis.thewavelength.net/
VTFLib/VTFEdit http://nemesis.thewavelength.net/
MDLDecompiler http://chaosincarnate.net/cannonfodder/mdldecompiler.php
GUIStudioMDL http://www.wunderboy.org/apps/guistudiomdl2.php
You will also need some type of modeling tool to
create the animations. I used this:
Milkshape 3D http://chumbalum.swissquake.ch/
1) Extract models and textures for the models into
your HL2 directory with GCFScape:

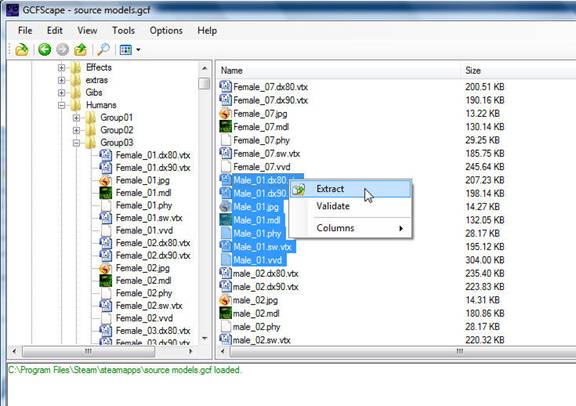
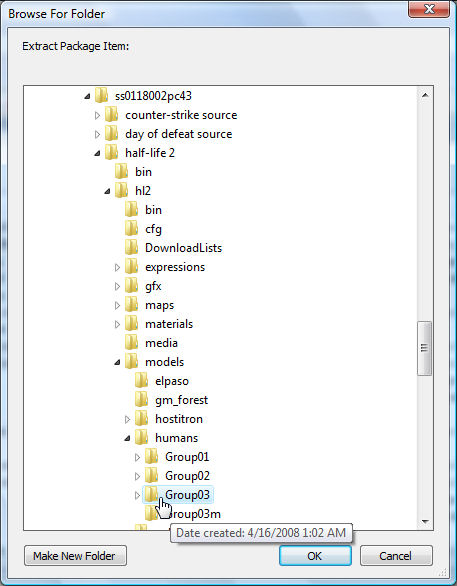
Extract the models into your Steam/steamapps/[username]/half-life 2/hl2/models folder…
in this case, the models/Humans/Group03 subfolder… Make
sure you extract ALL the
files for your model—the dx80, dx90, .phy,
.vtx and .vvd files.
Likewise, extract the model’s textures from the
source materials.gcf
file. Those will go in the /steamapps/[username]/half-life
2/hl2/materials
folder.
Once you’ve extracted the models, open ModelViewer from the SourceSDK
and make sure loads up fine. If not, you’re missing some
textures.
2) Decompile your model
Very
important note: You will have to
make sure the textures don't get
screwed up in the decompile step, or you will end up with
something
bad like this:
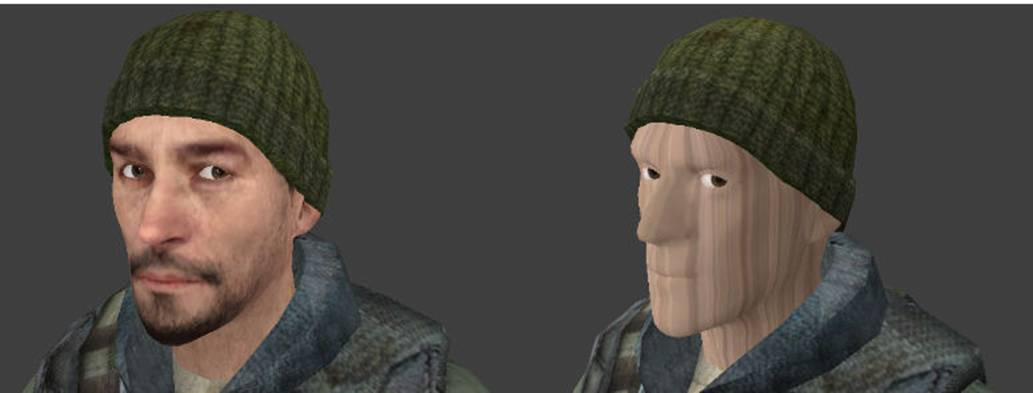
This problem occurs because the corresponding .vtf files have some interesting
settings in them that cause the UV maps to be “clamped”—which
means not
repeated.
Basically, it boils down to the fact that the pixels
aren’t getting mapped
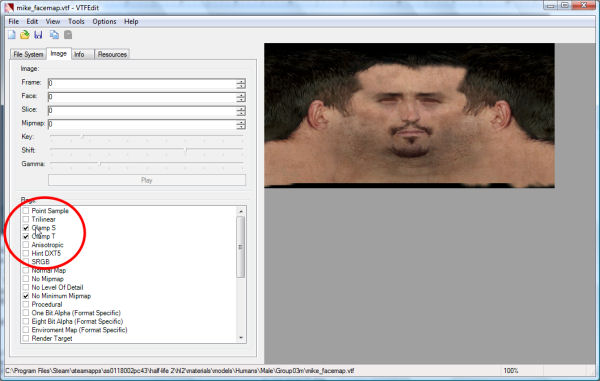
correctly. To fix this, open the model’s ‘face’ .vtf (you may have to do some searching
to figure out which .vtf correspond’s to your model’s face—hint… look in the .smd
file with WORDPAD or something…)
FIX IT using VTFEdit—Open the .vtf file
corresponding to your model’s face,
uncheck BOTH “Clamp S” and “Clamp T” and re-save:
 :
:
DO
THIS BEFORE DECOMPILING, or you will get the striped face as shown
above.
Now, you will need to decompile your model and then
recompile it
to include some custom animations for it. The decompiler is
MDLDecompiler—from the above link. You will need to put this in your
half-life 2\bin directory and run it from there.
MDLDecompiler takes a .mdl file as
input, and outputs several files—
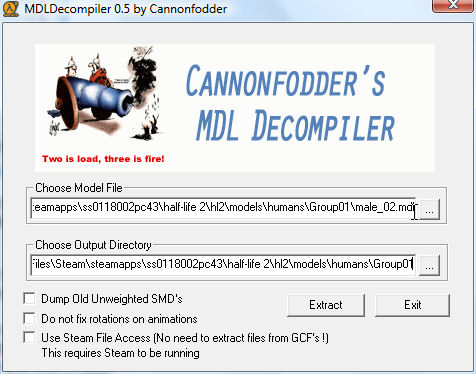
Notice I’ve used the same output directory as the one
for the input file. IMO
this keeps everything in one place and easy to
understand. Now click
Extract, and if everything goes well—MDLDecompiler outputs several
files, the ones of interest being the .smd
files and the .qc file.
Now you will have to determine which .smd file corresponds to the actual
mesh of the model—the “main” model file. In our case, it
was
male_02_reference.smd.
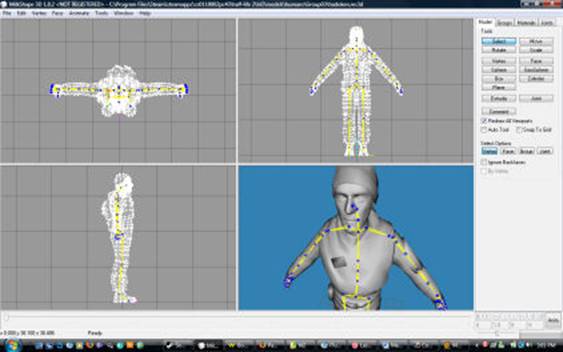
3) Import your .smd file into
a 3D editing program for animations,
and create an animation sequence.
I used “Milkshape 3D”
(30-day trial) for mine… it takes HL2 .smd files as
inputs,
and will do what we want. So, load up your .smd file.
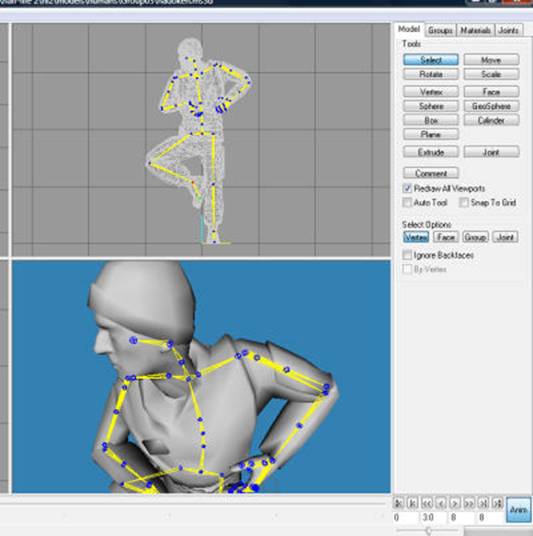
Milkshape has an animation button… the basic idea is to create
keyframes in your
animation and the HL2 engine will interpolate the intermediate
frames so that
the animation becomes smooth. Basically, you will be
selecting joints/bones,
and then rotating them for each keyframe.
See Milkshape’s documentation for
more info on how to do simple animations.
Once you’re done with your sequence…
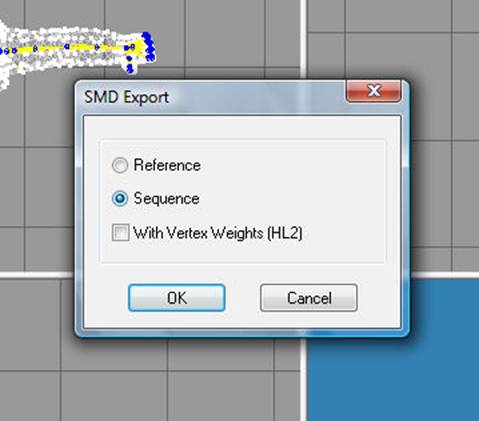
4) Export your animation as a separate .smd file
Milkshape is good, because it allows this.
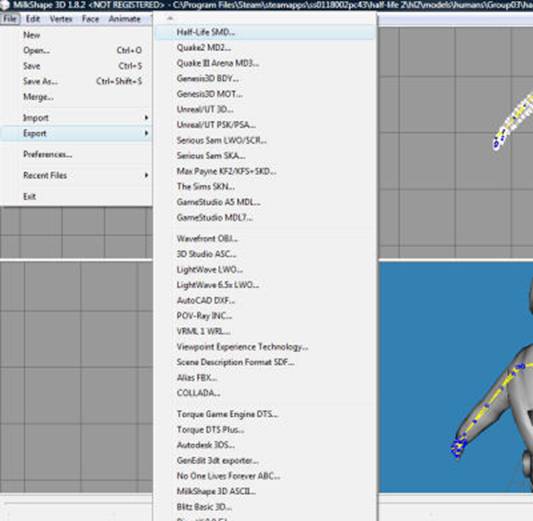
Make sure you choose “sequence only”… and save your .smd with a file
name something like “myanimation.smd.”
5) Edit the .qc file to add your animation:
Your .qc file will be in the
model folder, and be named “mdldecompiler.qc.”
This is the .qc file that
corresponds to the model you decompiled in step 2.
Open the .qc file in WORDPAD
and edit it to add the following line:
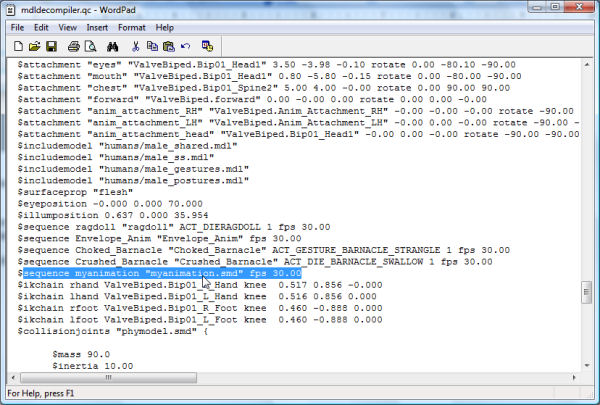
$sequence myanimation “myanimation.smd”
fps 30.00
Where “myanimation”
is the name you wish to give your new animation.
You may have to play with
the fps a few times to get the speed right. You can set
It to any float value
between 1.00 and 256.00 (I think)…
You can also change the name
of your model so you can continue to use HL2’s original
model alongside your newly updated one:

Notice I used
“male_02_dead.mdl” and “male_02_dead” in the following line. These
names have to match, or HL2 will freeze and not load your
model. But, they can
be whatever name you choose.
Now just one more step. Load
your .qc file into GUIStudioMDL, and compile
6) Recompile your model using GUIStudioMDL
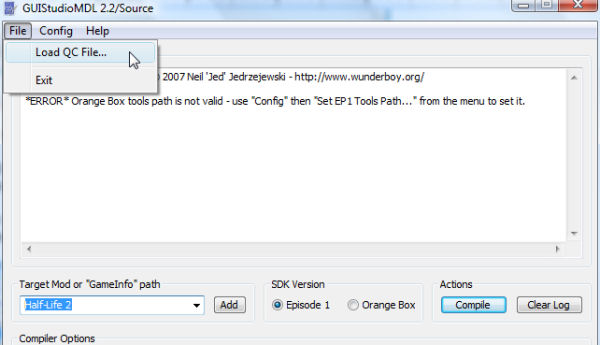
Hit the compile button. If
everything goes well, you will now have a new .mdl
file
To play
with.
Try it: Start up ModelViewer, and open up your model. You should be able to
find
your new animation under “sequence”… this is where you
can adjust the playback
speed of your animation. ModelViewer
comes with an fps slider. Adjust to taste
and recompile your model if needed.
Tut by: Chad Lehman icbiass@hotmail.com